VPC Peering
This guide explains how to configure a secure VPN tunnel between two Virtual Private Clouds (VPCs) within the Cloud Management Portal. VPC-to-VPC connectivity allows virtual machines (VMs) hosted in separate VPCs to securely communicate with each other over encrypted tunnels using IPsec VPN.
Unlike Private Gateway configurations—which require administrative-level involvement and dedicated networking setup—VPC-to-VPC VPN is a self-service option designed for users to configure through the portal UI without any admin assistance.
This document covers the entire setup process, including:
-
Creating VPN gateways and customer gateways
-
Configuring VPN connections (active/passive)
-
Ensuring successful connectivity
-
Key networking requirements
-
Basic troubleshooting
Networking Requirements
Before proceeding with VPN configuration, it’s essential to understand and validate your network structure:
-
Unique IP Ranges: Ensure each VPC uses distinct IP ranges. Overlapping CIDR ranges will prevent traffic from routing over the VPN tunnel.
-
Public IP Availability: VPN tunnels use public IPs (Source NAT) assigned to each VPC for external routing.
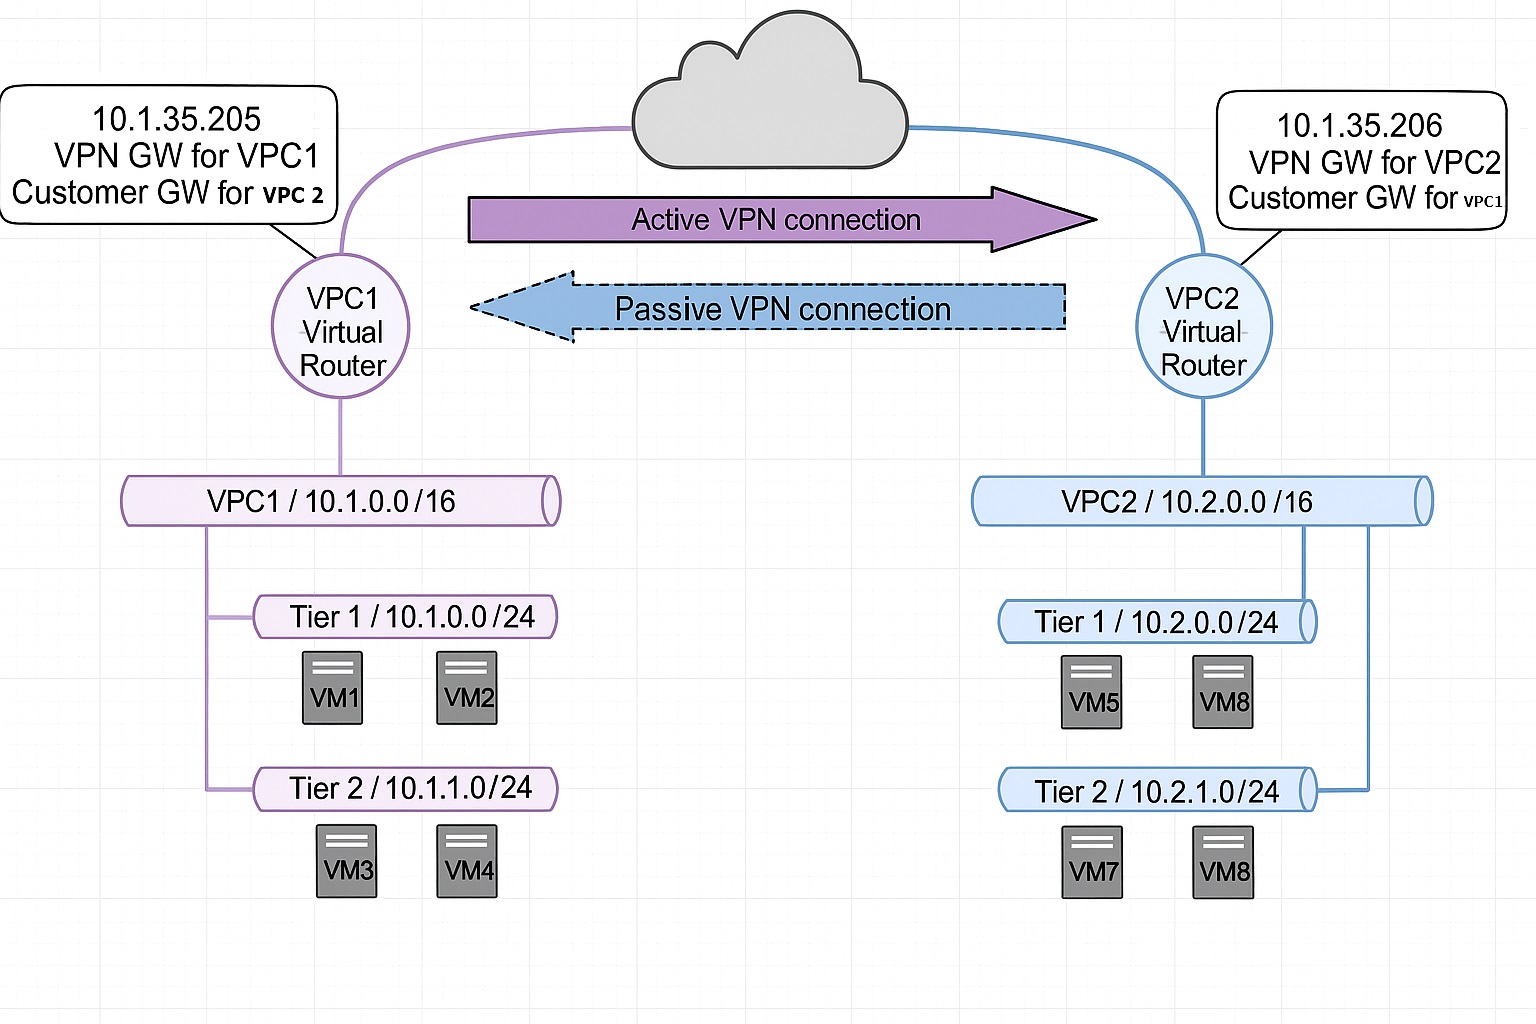
| VPC | Super CIDR | Tier1 | Tier2 |
|---|---|---|---|
| VPC1 | 10.1.0.0/16 | 10.1.0.0/24 | 10.1.1.0/24 |
| VPC2 | 10.2.0.0/16 | 10.2.0.0/24 | 10.2.1.0/24 |
The two V PC's can belong to the same or different user accounts and even operate across separate portal deployments. However, if using different cloud environments, VPN compatibility should be verified.
Key Components
1. VPN Gateway
The VPN Gateway is the local VPN endpoint that allows incoming VPN connections. It is configured on the Source NAT IP of the virtual router within the VPC.
-
It is created automatically when VPN is enabled on a VPC.
-
Only one gateway exists per VPC.
2. VPN Customer Gateway
The Customer Gateway defines the remote VPN endpoint you want to connect to. You must configure:
-
Name: A user-friendly identifier.
-
Gateway IP: The public-facing IP of the remote VPC router.
-
CIDR List: List of remote network ranges (comma-separated) that your local VPC can communicate with.
-
IPsec Pre-Shared Key: A secure shared secret for authentication.
-
IKE and ESP Parameters: Define encryption algorithms, hashing, lifetime, and Perfect Forward Secrecy (PFS).
3. VPN Connection
This establishes the encrypted tunnel between your VPC and the remote VPC.
-
Active Mode: The VPC initiates the tunnel. Used when your VMs consume remote resources.
-
Passive Mode: The VPC waits for incoming VPN connection requests. Used when your VMs host resources for others.
Important: Ensure resources on both ends are reachable through the CIDR blocks configured in the customer gateways.
Step-by-Step Configuration
1: Create and Configure VPC Networks
- Ensure that both VPCs are created with proper CIDR blocks and associated ACLs configured. Refer to the VPC creation guide for details.
2. Create VPN Customer Gateways
-
Refer to the VPN Customer Gateway link for more details.
-
Repeat this for both VPCs.
3. Create VPN Gateways
-
Refer to the VPN Gateway link for more details.
-
Repeat this process on the second VPC.
Note: Each VPC can have only one VPN Gateway, automatically associated with its Source NAT IP.
4. Configure VPN Connections
-
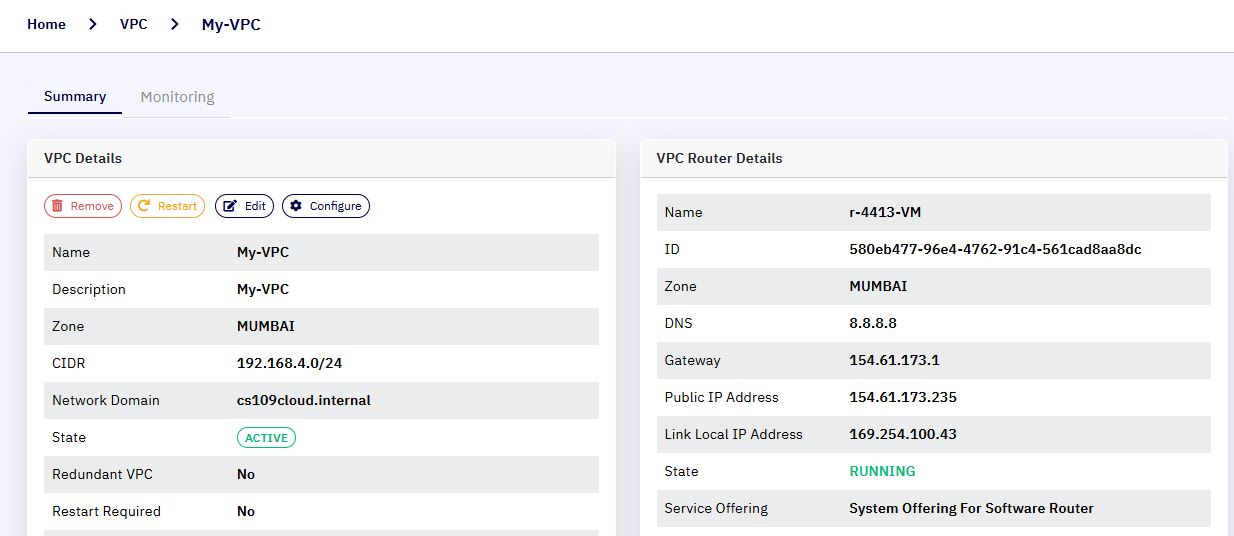
Click on the VPC name (e.g., VPC1) to view its details.
-
On the VPC details page, click the Configure button.
-
This action will take you to the VPC Configuration Dashboard.
-
In the VPC configuration page, scroll to the Router section.
-
Click on the link labeled Site-to-Site VPN Lists.
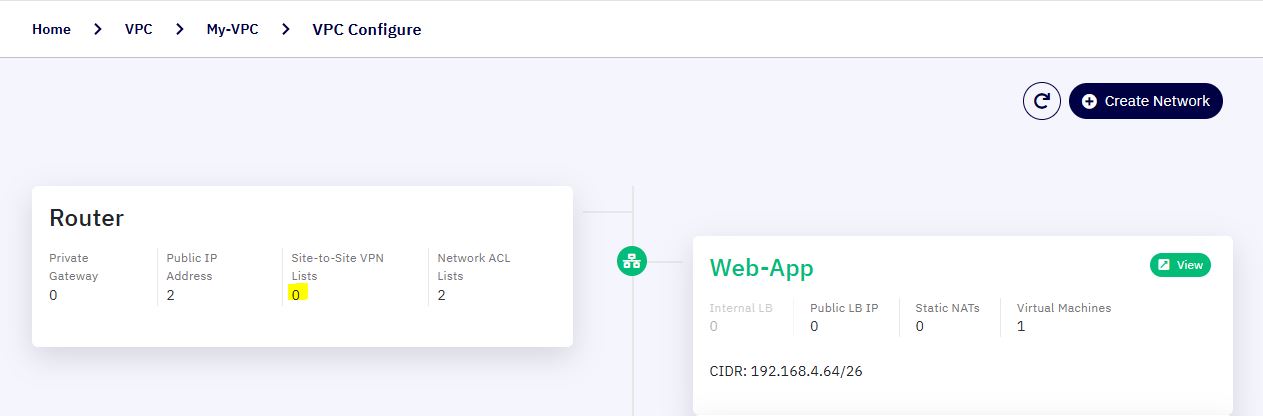
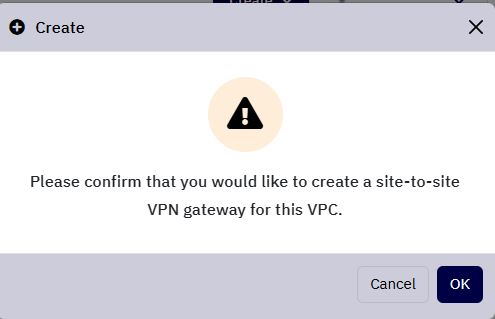
Note: If this is the first time you are enabling VPN for this VPC, a pop-up dialog will appear with the message:
"Please confirm to create S2S VPN gateway for this VPC."
-
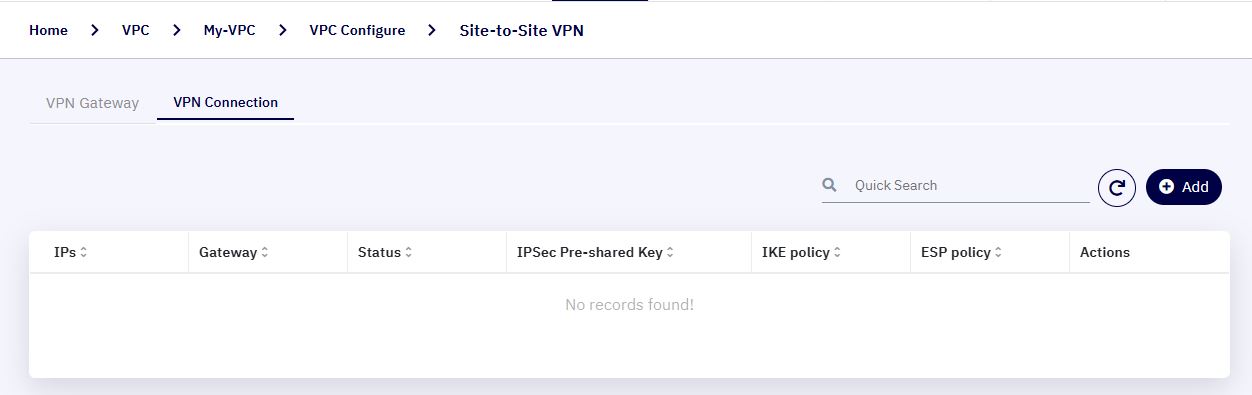
Navigate to the VPN Connection tab within the VPN Gateway configuration page.
-
Click on the Add button to start configuring a new connection.
-
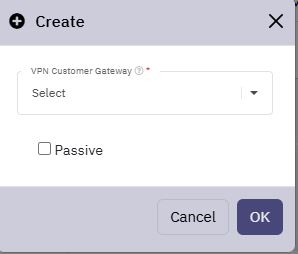
A pop-up window will appear prompting you to select a Customer Gateway.
-
Use the drop-down list to select the appropriate Customer Gateway that matches your external VPN device settings. Enable the Passive checkbox.
-
Click OK to initiate the VPN connection setup.
- Now, repeat the process from the second VPC (VPC2)
Validation and Troubleshooting
-
Once configured, refresh both VPN Connections pages and verify that the status is Connected.
-
If the connection doesn’t establish automatically, go to the active connection (from VPC1) and click Reset VPN Connection.
-
From the VPC1 side, try to ping VPC2 instances using internal (private) IPs to confirm connectivity.
Summary
With VPC-to-VPC VPN enabled:
-
You can seamlessly integrate workloads across isolated VPCs.
-
Resource sharing, centralized services, and high-availability clusters across regions are now possible.
-
Configuration is self-service and requires no administrator approval.